
Creating a ODI 14c Integration Project
In this post we will show how to perform the base setup of a new ODI Integration Project. We will create sample data and replicate it.
Table of Contents
In the last post we showed how to install Oracle Data Integrator 14c on Linux. In this post we will setup a Integration Project and replicate sample data from one database to another database. To start we need a running ODI installation as described in the mentioned post.
Preparing the databases
We create a table t_src in the source schema src of the pluggable database pdb1. Then we create a new pluggable database pdb2 and create an empty table t_trgt in the schema trgt. We create one million rows in the source table.
# run as the root user
cat > /tmp/s.sql <<EOF
-- create a new pluggable database
create pluggable database pdb2 admin user pdbadmin identified by changeme;
alter pluggable database pdb2 open;
alter pluggable database pdb2 save state;
-- create the source schema
alter session set container=pdb1;
grant dba to src identified by changeme;
-- create 1 million rows in the source table
create table src.t_src tablespace users as select a2.* from all_objects a1, all_objects a2 where rownum<=1e6 order by a1.object_id;
-- create the target schema
alter session set container=pdb2;
grant dba to trgt identified by changeme;
-- create an empty table in the target schema
create table trgt.t_trgt as select * from all_objects where 1=0;
exit
EOF
su - oracle -c 'sqlplus -S / as sysdba @/tmp/s.sql'
Sample Output (click to expand)
[root@lin7 ~]# cat > /tmp/s.sql <<EOF
> -- create a new pluggable database
> create pluggable database pdb2 admin user pdbadmin identified by changeme;
> alter pluggable database pdb2 open;
> alter pluggable database pdb2 save state;
> -- create the source schema
> alter session set container=pdb1;
> grant dba to src identified by changeme;
> -- create 1 million rows in the source table
> create table src.t_src tablespace users as select a2.* from all_objects a1, all_objects a2 where rownum<=1e6 order by a1.object_id;
> -- create the target schema
> alter session set container=pdb2;
> grant dba to trgt identified by changeme;
> -- create an empty table in the target schema
> create table trgt.t_trgt as select * from all_objects where 1=0;
> exit
> EOF
[root@lin7 ~]# su - oracle -c 'sqlplus -S / as sysdba @/tmp/s.sql'

Pluggable database created.


Pluggable database altered.


Pluggable database altered.


Session altered.


Grant succeeded.


Table created.


Session altered.


Grant succeeded.


Table created.

[root@lin7 ~]#
Create the project and define the Data Sources
Now we create the new Integration Project in the Oracle Data Integrator Studio. We start the ODI Studio, enter the Wallet password, click on “Connect to Repository…” and select the plus sign to define a new connection to the work repository:
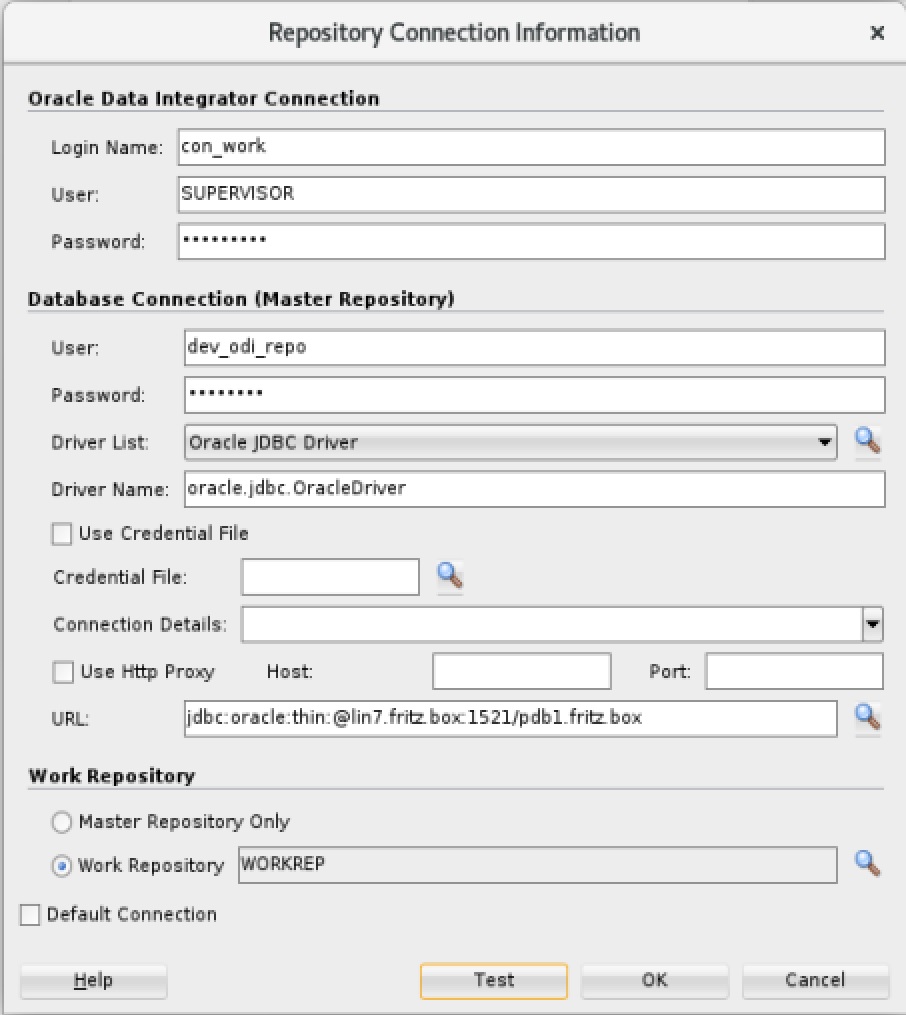
The password for the SUPERVISOR is changeme#. The database connection data is: dev_odi_repo / changeme URL: jdbc:oracle:thin:@lin7.fritz.box:1521/pdb1.fritz.box. After defining the connection we connect to the work repository and create a new project. We go to Designer => Projects => New Project => The name of our project will be SampleIntegration. Press Ctrl+s to save the new project. To define the 2 new Data Sources we go to Topology => Physical Architecture => Technologies => Oracle (right click) => New Data Server
- Name:
Ora_DS_source - User/Password:
src/changeme - JDBC URL in the JDBC tab:
jdbc:oracle:thin:@lin7.fritz.box:1521/pdb1.fritz.box - press Ctrl+s to save the Data Source
We do the same for the target Data Source (Oracle (right click) => New Data Server):
- Name:
Ora_DS_target - User/Password:
trgt/changeme - JDBC URL in the JDBC tab:
jdbc:oracle:thin:@lin7.fritz.box:1521/pdb2.fritz.box - press Ctrl+s to save the Data Source
Now we define the physical schema by right clicking on the Data Source and selecting New Physical Schema:

On the source Data Set we set the Schema and the Work Schema to src and on the target Data Set we set both fields to trgt. After that we save the changes with Ctrl+s.
Create the Logical Architecture
In the Topology tab we go to Logical Architecture => Technologies => Oracle => right click (New Logical Schema). We create two logical schema with the following settings (Ctrl+s to save the changes):
| Logical Schema Name | Global Context set to |
|---|---|
Ora_LS_src | Ora_DS_source.SRC |
Ora_LS_trgt | Ora_DS_target.TRGT |
To define a Logical Agent we go to Topology => Logical Architecture => Agents => right click (New Logical Agent). The name is LogAgent1 and we set the physical Agent in the Global context to: OracleDIAgent.
Define the Model and the mapping
Next we define the Model in the Designer Tab. We go to Designer => Models => New Model Folder. We can set the name to: SampleModel and save with Ctrl+s. Right clicking on the newly created folder allows us to create two new Models with the following data (save the changes with Ctrl+s):
| Name | Technology | Logical Schema |
|---|---|---|
Ora_LS_src | Oracle | |
Ora_LS_trgt | Oracle |
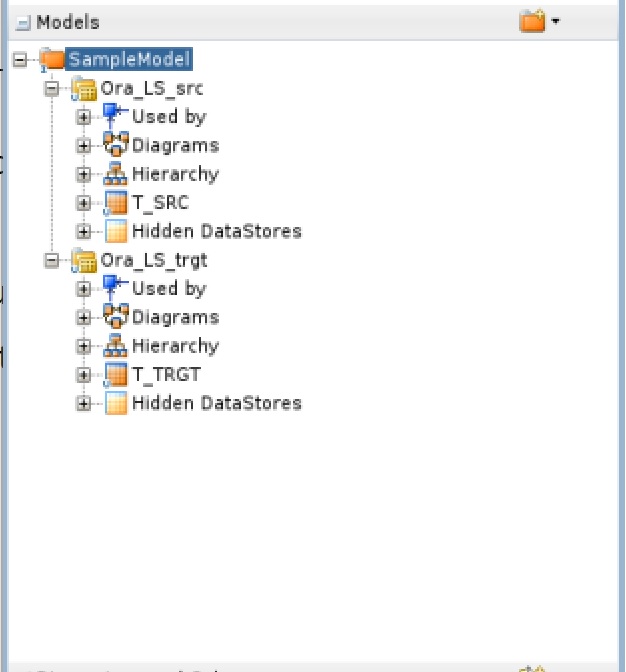
Now we need to add the source and target tables to the model(s). We open the model and select the “Selective Reverse-Engineering” tab. Here we check “Selective Reverse-Engineering” and “Objects to Reverse Engineer”. In the below list we can select or unselect the tables we want to use in our mapping. We select T_SRC for the Ora_LS_src model and T_TRGT for the Ora_LS_trgt model. After that we click on “Reverse Engineer”. After the changes the model should look like this:
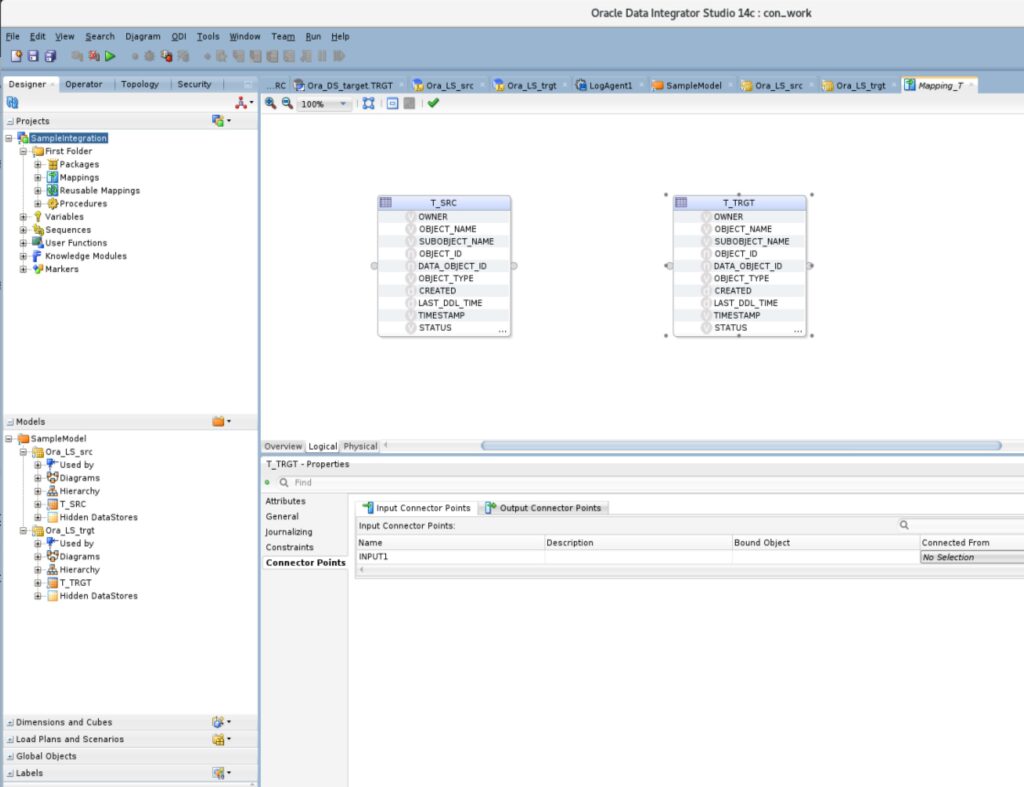
To define the flow of the data we create a mapping. We can do this in Projects => SampleIntegration => First Folder => Mappings => right click (New Mapping). The name can be Mapping_T. Uncheck “Create Empty Dataset” and click OK. Now we are able to drag and drop the source and target tables from the models into the Mapping:
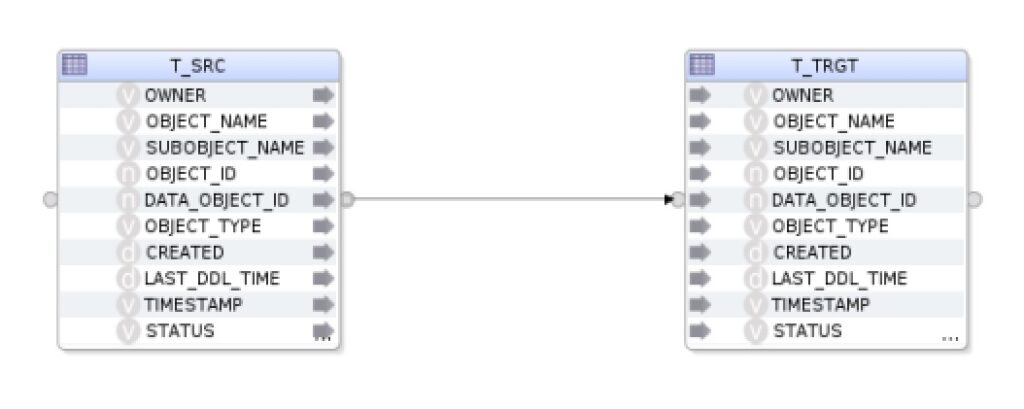
To define the column mapping we can create a connection between the two tables by connection the dots (click on the right source table dot and connect it to the left dot of the target table. We confirm the Attribute Matching window by clicking OK:
If we would like to change the data values we could for example add 100 to the object_id column in the table T_TRGT by selecting the OBJECT_ID field and adding +100 to the field below:

Next we go to the Physical tab, select the object with the name T_SRC_AP and change the Loading Knowledge Module from “LKM Oracle to Oracle Pull (DB Link).GLOBAL” to “LKM Oracle to Oracle (Built-In).GLOBAL”. Now we can save the work with Ctrl+s and.
First run of the Mapping
Before we run the Mapping for the first time we get the status of the current rows in the source and target tables:
# run as the root user
cat > /tmp/mon.sql <<EOF
-- status of the source table
alter session set container=pdb1;
select count(*),max(object_id) from src.t_src;
-- status of the target table
alter session set container=pdb2;
select count(*),max(object_id) from trgt.t_trgt;
exit
EOF
su - oracle -c 'sqlplus -S / as sysdba @/tmp/mon.sql'
Sample Output (click to expand):
[root@lin7 ~]# su - oracle -c 'sqlplus -S / as sysdba @/tmp/mon.sql'
Session altered.
COUNT(*) MAX(OBJECT_ID)
---------- --------------
1000000 77720
Session altered.
COUNT(*) MAX(OBJECT_ID)
---------- --------------
0
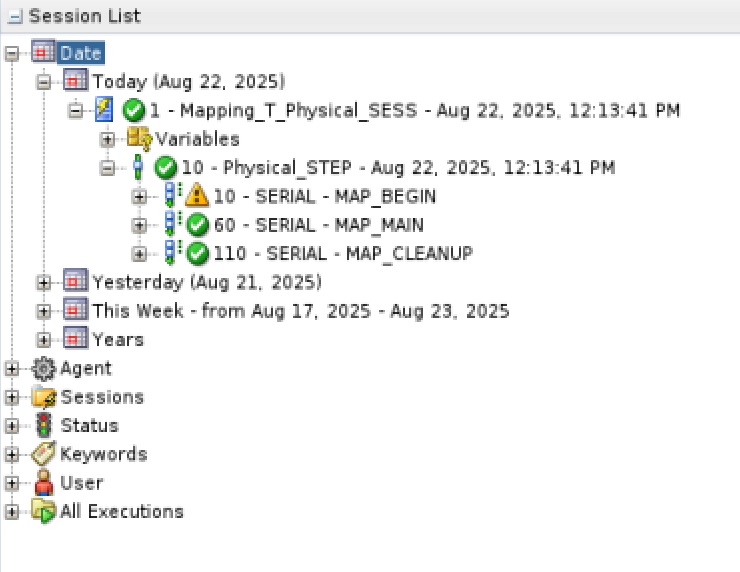
[root@lin7 ~]#We can now start the Mapping by clicking on the green play button while the mapping is open. We select LogAgent1 in the Logical Agent field and click OK. In the Operator Tab (Session List => Today) we can monitor the run. Click on Refresh to update the view. When the Job has finished without errors we will see the following:
And we can see that the target table has been filled and the objects ids have been increased by 100:
su - oracle -c 'sqlplus -S / as sysdba @/tmp/mon.sql'
Sample Output (click to expand):
[root@lin7 ~]# su - oracle -c 'sqlplus -S / as sysdba @/tmp/mon.sql'

Session altered.


  COUNT(*) MAX(OBJECT_ID)
---------- --------------
   1000000          77720


Session altered.


  COUNT(*) MAX(OBJECT_ID)
---------- --------------
   1000000          77820

[root@lin7 ~]#
Leave a Reply